The reinstallation of the windows was the most painful and difficult job I've done during the rebuild. Taking them out was easy; but once the hard top sides had been repainted it was time to refit them. So I decided to get new window seals. That's when the fun started.
Talk about confusing!
All I wanted was new seals to attach the rear fixed side windows and quarter panel windows (those smallish ones on either side of the rear door) to the sides, and for the alpine windows in the hard top.
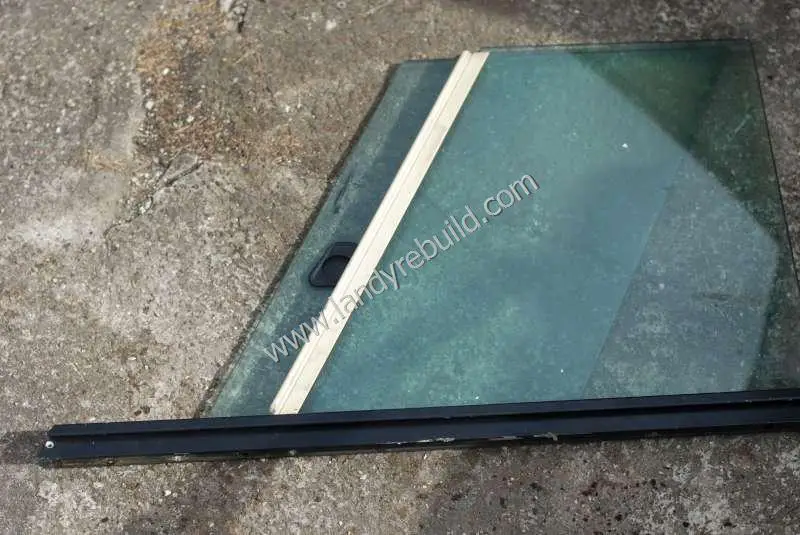
Now despite having a parts diagram, I still wasn't too sure which seals were which. I've since ascertained that the glass in the rear body (sides, quarter panels and alpine windows if fitted) of older Land Rovers was 5mm thick. From 1987 this thickness was decreased to 4mm (probably to decrease costs), and obviously the seals changed too. Not only the seal itself, but the filler strips were now also different!
But despite having the same thickness of glass as the side windows, the seal for the quarter panel windows is different, being much narrower (to allow more of a bend due to the sharp corners). So the part numbers I required were as follows:
- Seal for 5mm glass in the sides and alpine windows: part number 302177. Filler strip part number 302178.
- Seal for 5mm glass in the quarter panel windows: part number 306287. Filler strip part number 306289.
The length of seal (and filler strip) required to install one of the rear side windows was 2.23m. The rear quarter panel window seal (and filler strip) required 1m per window.
Of course the seal does stretch a bit whilst you're installing it, so generally you'll end up with a seal which is slightly too long. It's easy enough to trim it off at this stage. But even if you've made a mistake in your measuring and have cut the seal too short, it's also easy enough to insert another piece. If they're butted up tightly together I think it's highly unlikely the seal will leak. The filler strip, seeing as it goes on the inside, is also unimportant when it comes to length - you could even install it in 10cm lengths if you wanted, not that I would recommend this of course! But do try and stagger it so that the (miniscule) gap between the ends of the filler strip is on the opposite side of the window to the (miniscule) gap between the ends of the window seal.
Strangely enough, I later found that I inexplicably had more photos of the installation of glass in the door tops, although these proved much easier to do. Only one photo of the installation of the glass in the side panels existed:
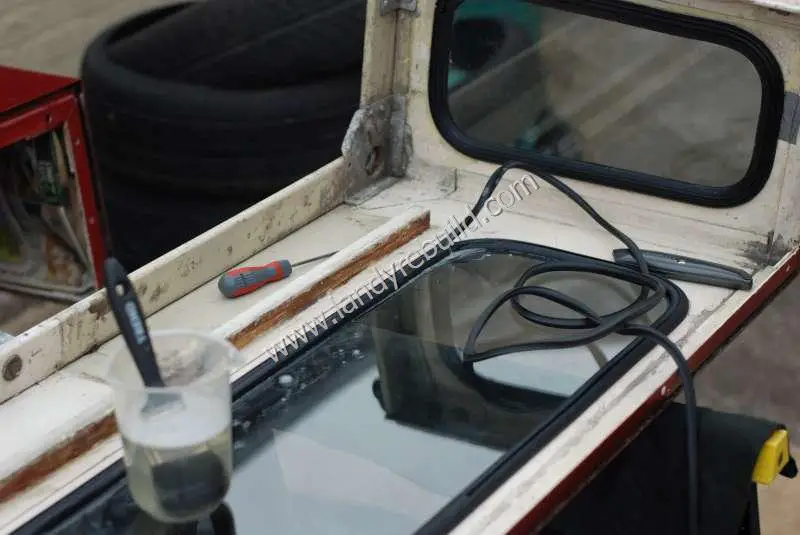
Anyway, here's the methodology I employed:
For the rear windows, first attach the seal to the glass. Then offer up the glass to the hole. It should be fairly easy to feed the seal through the first side, the first corner, and the second side. Leave the bottom until last. Now attach a piece of single electrical flex (don't use string, electrical flex has a much smoother surface) into the channel in the window seal, leaving the ends dangling.
Carefully pull one end of the wire downwards (ensuring that the other end remains where it is), and at the same time carefully feed the seal through the gap. Don't just pull the flex, because there is a danger you'll rip through the seal.
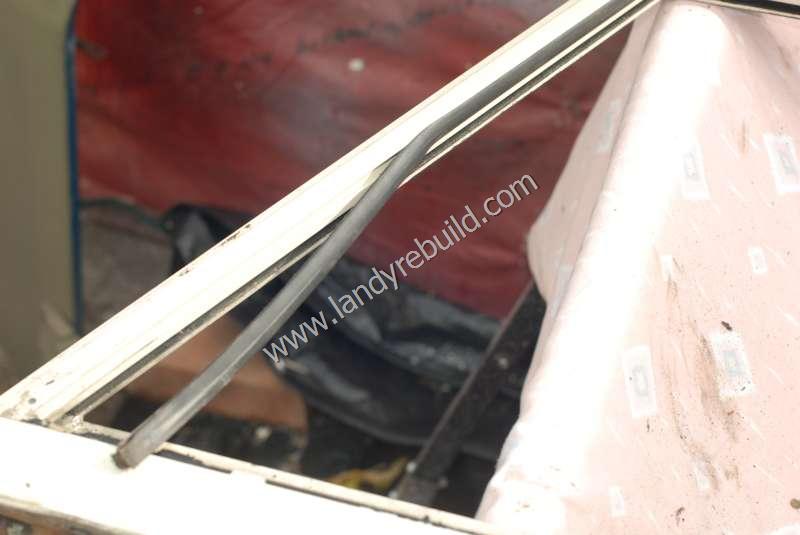
For the rear quarter windows, although the seal looks the same, it isn't. The method for reinstalling these is slightly different. Here, the seal is inserted into the window aperture first, then the glass is gently pushed through from the inside.
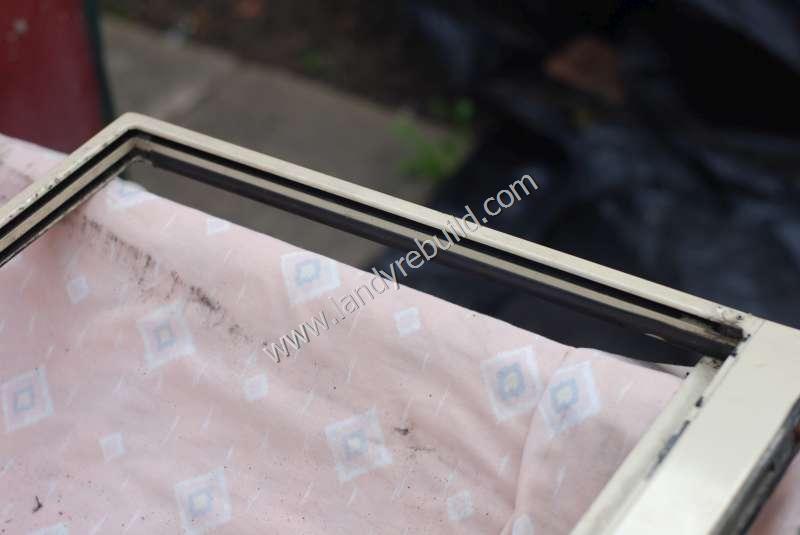
Note that all of these seals have a slot which is filled with the filler strip. This expands the seal and locks it in place, securely holding the glass in the aperture. The filler strip needs to be on the inside of the glass, not the outside (as I have seen done). The reason for this is if it is on the outside, it can simply be pulled out, which makes it then very easy to remove the window by a would-be thief.
When it comes to putting in the filler strip, you may have read on the Internet that you should use washing up liquid to make insertion easier. Don't. It's slimy and messy and dries too quickly. Well, I say don't use washing up liquid - actually you do. But the trick is to take a jug of water, add a good squeeze of washing up liquid to it, and then use a brush to liberally slather the filler strip and seal, doing a short section at a time. Have you brushed it on liberally? Are your feet wet? If so, that's enough. The filler strip should go in fairly easily now.
When it came to the Alpine windows, these were refitted using the same technique, although the hard top had by then been refitted to the vehicle. I'm not sure if this was a good idea or not.
A window seal insertion tool was recommended to make this job easier, and I managed to find one fairly cheaply. However, I found it wasn't much use, and reverted to using my thumbs and a blunt screwdriver. Fortunately I have fairly strong hands, but I still ended up with tennis elbow. For the uninitiated, tennis elbow has nothing to do with tennis. It's a repetitive strain injury known to the medical world as lateral epicondylitis, and is caused by the tearing of a tendon on the outside of the elbow. I can confirm that it's rather painful, which is probably why I decided not to install a new windscreen seal (see below).
My advice concerning the filler strip - if you're contemplating doing this - would be to take your time and put it in an inch or so at a time (as the actress said to the bishop).
Compared to all this, the door top glass replacement turned out to be a doddle.

The new safari door came with heated glass pre-installed, although I have removed the glass in a rear safari door when I had my Series III (I had wanted a heated rear window).
When it came to the windscreen - after the trouble I had with the sides, I decided not to install a new seal, and instead masked off the existing seal (which was in fairly good condition anyway), and painted around it.
Here's a photo of what it looked like before it was removed from the vehicle. It also shows what a folded-down windscreen looks like on a 110!

Comments
Have your say about what you just read! Leave a comment in the box below.
(Your email will not be displayed)
NOTE: All comments are moderated, so will not appear immediately.