Following the debacle of the "Paint matched while you wait" episode, some internet research turned up a supplier of automotive paint, www.auto-paint.co.uk. Following some email correspondence with them (they were extremely helpful) I settled on the colour "Rioja Red" which is actually a Land Rover colour.
Now, how to apply the paint? I've previously tried spray-painting and really disliked the process. Paint went absolutely everywhere - and not only that, the amount of thinners required to clean up afterwards was astounding. I found that using a small paint roller was a much more controlled method. Of course because the paint is not designed for roller application one has to work rapidly - and not only that, it's difficult to get into some nooks and crannies. Unless you use a brush, of course, but that leaves brush-strokes which rather defeats the purpose.
Around this time we visited a friend of ours who builds wooden kayaks as a hobby. She suggested I try an HVLP Sprayer.
Having shopped around, I managed to get an Earlex Spraystation at a good price. The rear body was the first object to be attempted, having already been stripped of the old paint. (The key to a good finish is proper surface preparation).
Using an HVLP Sprayer
Instructions? What are they? Oh, that bit of paper that was thrown away when the machine was taken out of the box? Never mind.
So, fill tin with paint after having checked the viscosity using the small plastic funnel. It takes about a litre. In my case, the instructions on the paint tin for the etch primer said not to dilute it. It seemed runny enough anyway.
I switched on the machine, pointed the nozzle at the panel, and pressed the trigger.
I immediately had two problems. First, the amount of paint spray ejected by the nozzle would have made Chernobyl jealous. Whooooosh! The paint container was half empty in the first five seconds. I stopped spraying, turned the nozzle flow screw all the way in, then backed it off about half a turn. Much better.
The second problem was that the volume of air through the hose seemed to be pressurising the can. Duh, obviously that's how it works. The problem was, paint was running out from under the rim. There goes the rest of the tin. Having done half a side of the rear tub, the tin was empty. When I refilled it, I saw the problem. It is extremely easy to cross-thread the paint container when fitting it to the gun section, and that was what had happened.
The second attempt was much better.
So, some tips on using one of these machines:
- Make sure the tin is fully sealed to the gun and not cross-threaded
- Turn the volume control clockwise all the way until it stops, then gradually back it off until you have the correct volume of paint coming out of the gun.
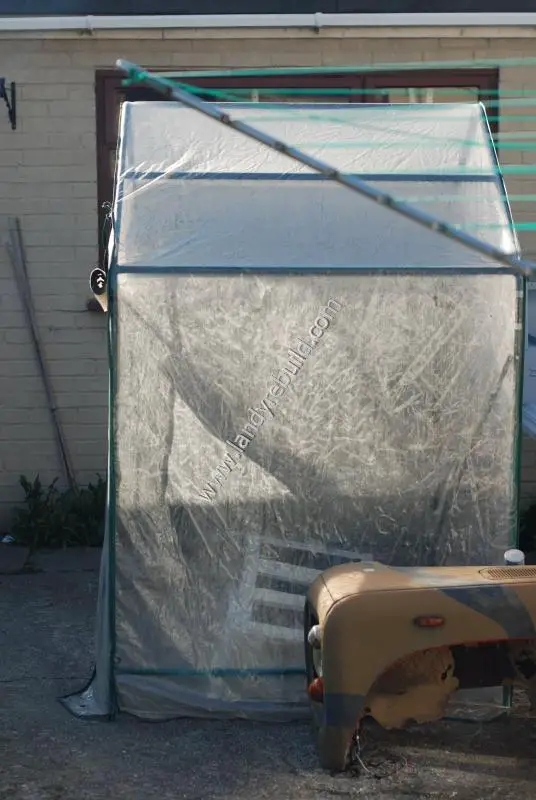
For the smaller panels I used an old plastic greenhouse as a spray booth. I set it up in the concreted back garden, with a few old sheets to cover the floor.
Overall, I was quite impressed. There's much less overspray than with a conventional spraygun. Although I still dislike cleaning the equipment, I'm now a convert from using a paint roller. An HVLP sprayer can be used for varnishes and ordinary water-based paint too; for example painting a garden fence. I have yet to try it out in repainting a room though.
Comments
Have your say about what you just read! Leave a comment in the box below.
(Your email will not be displayed)
NOTE: All comments are moderated, so will not appear immediately.