As the heater had already been renovated, it was time to reinstall it in the vehicle before refitting the passenger wing. It can be removed and installed with the wing in place, but I figured it would be easier this way!
It is attached to the bulkhead at the top with two bolts. I put the heater assembly in position first to check if there were any issues. The first thing I noticed was the large gaps at the sides between the heater assembly and the bulkhead.
I had already installed the squishy foam-rubber thing referred to as a "Seal - Heater Duct MTC6871" but this appeared to be insufficient. Fortunately I had some bits of foam padding lying around, left over from when I made my own bench seats for my Series III. I cut out a rectangle of foam and fitted it in place before tightening the two top bolts.
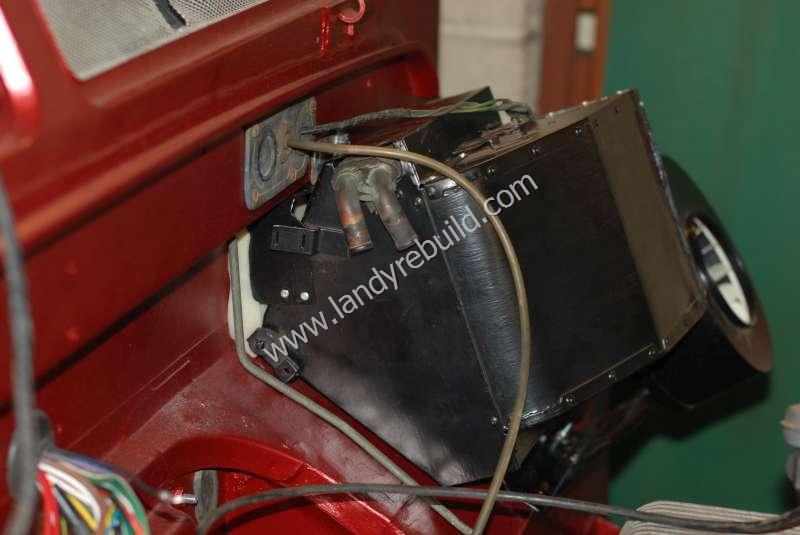
I then found that the bracket on the lower section of the heater assembly also needed to attach to the bulkhead, at the passenger footwell. This required drilling two holes through my nice newly-renovated footwell. I did these one at a time - the photo below shows one of the bolts in place.
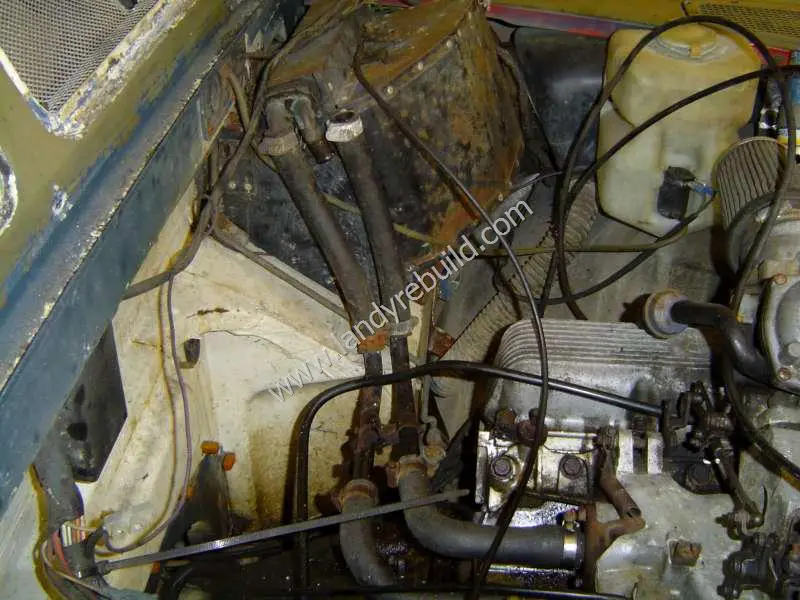
With the heater securely mounted, it was then time to reconnect the heater controls and radiator pipes. The photo I had taken before disassembly proved useful here, although I don't think it matters too much which hose is connected to which port on the radiator.
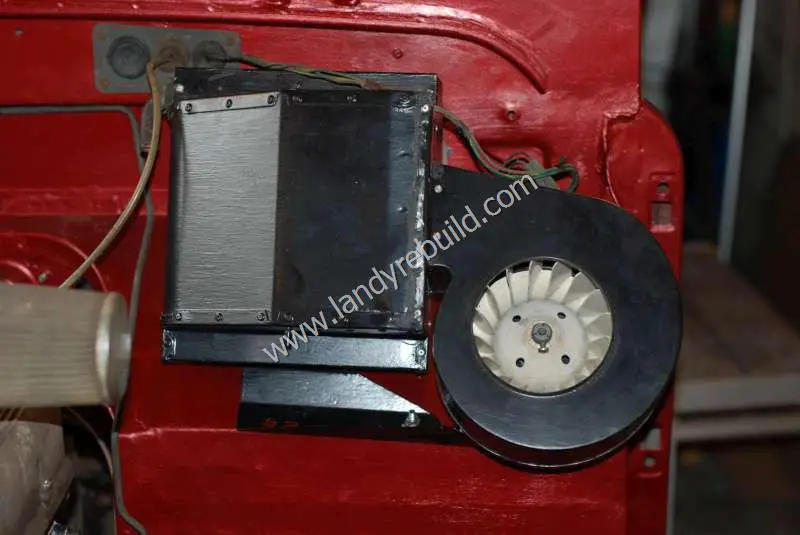
The control cables are attached to the control levers on the heater housing using a simple clip-and-bolt mechanism. It's worth ensuring that the control cables are well lubricated first though. As I used to own a motorcycle with a non-hydraulic clutch, I already owned a cable lubricating device. It simply clamps on to the end of the cable and you insert the spray tube nozzle tube from a tin of spray oil into the small hole. Add oil until some drips out of the other end of the cable.
The lower control lever operates a flap which opens or closes the gap between the heater and the bulkhead (basically this is equivalent to the "recirc" control on more modern vehicles). The upper lever operates a flap which diverts air either past the heater radiator, or through it. At the dashboard side this lever also operates the fan.
I decided to wait until the passenger wing was installed before reattaching the heater duct. Unfortunately I was left with a 1cm gap between the heater duct and the fan intake, but I solved this problem by using a band of single-sided adhesive foam rubber tape around the heater duct to seal the gap.
Comments
Have your say about what you just read! Leave a comment in the box below.
(Your email will not be displayed)
NOTE: All comments are moderated, so will not appear immediately.