To start the front axle renovation, the first task was to dismantle both hubs. Now I suppose it would have been easier to have done this whilst the axle was still attached to the vehicle; it would certainly have made the axle lighter!
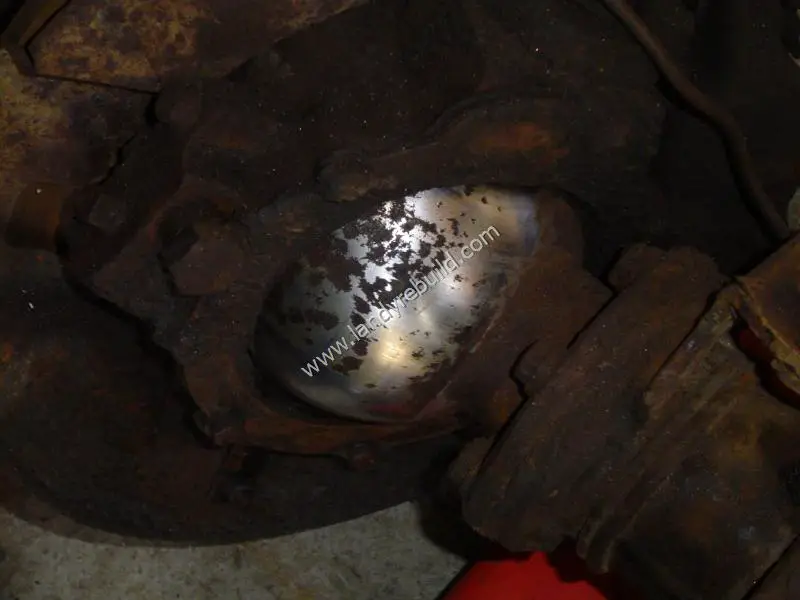
The cause of the leakage from the front swivels was immediately apparent - corrosion of the swivel housing:
I tried ordering new chrome swivel housings from Craddocks without success; apparently they are no longer made. Paddock Spares stated that the new teflon-coated Britpart ones they supply were longer-lasting. Although I wasn't fully convinced about that, it's not like I had a choice, so I ordered a pair anyway. Whilst waiting for the parcel to arrive, I started the dismantling.
I drained the oil from the swivel housing, then removed the brake calipers - I will be replacing them as they are very rusty. The brake discs on the other hand were in quite good condition. I removed the dust cap, circlip, and drive shaft shim, then undid the 5 bolts holding the drive member to the hub. Once the lock washer tab was removed, I noticed that the locknut had been coaxed tight with a chisel. New locknuts were therefore added to the shopping list. For the reinstallation of these it is worth purchasing the correct tool - a 2"AF or 52mm hub spanner - fortunately I already had one; having carried out the servicing of my previous Series 3.
The hub and brake disc assembly were then removed, and the old bearings were drifted out. Back to the axle - I removed the mud shield and stub axle. I won't be putting the mud shield back as it seems of dubious worth. I was then able to pull the cv joint and half-shaft out of the axle casing. Inspection of these items revealed they were abolutely fine.
The upper and lower swivel pins were then removed from the swivel pin housing, and this then gave access to the (rusty) chrome swivel housing, which was removed from the axle. The same procedure was carried out on the passenger side.
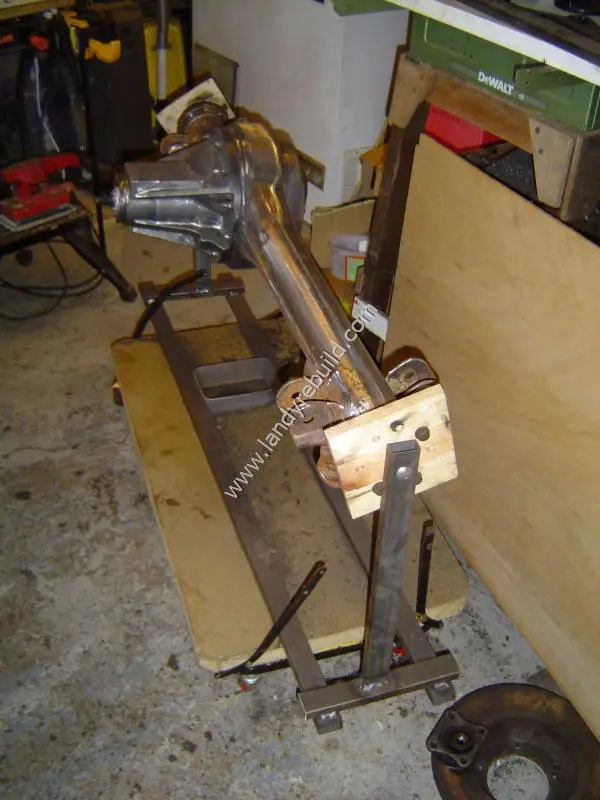
All parts were then washed in solvent and allowed to dry before I started removing the rust with a wire brush on an angle grinder. In order to work on the front axle (because it's so heavy) I welded up a frame with some rectangular box section I had laying around and was able to mount the axle on this frame so it is easier to work on it. The whole frame is mounted on the mechanic's creeper so I can move it about as necessary. (I'd actually already cleaned the entire front axle before I thought about taking a photo!)
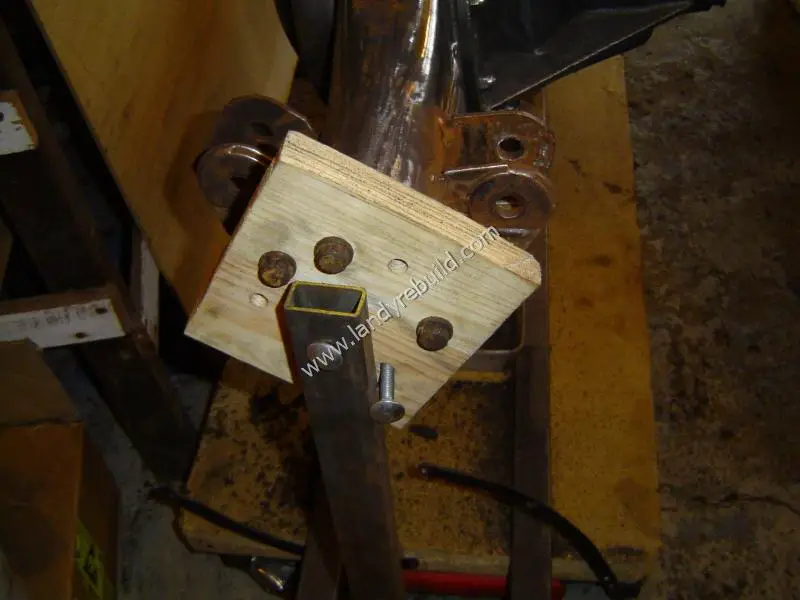
The following picture shows a bit more detail of one of the "mounts" which enabled me to lock the axle in any particular position using a bolt.
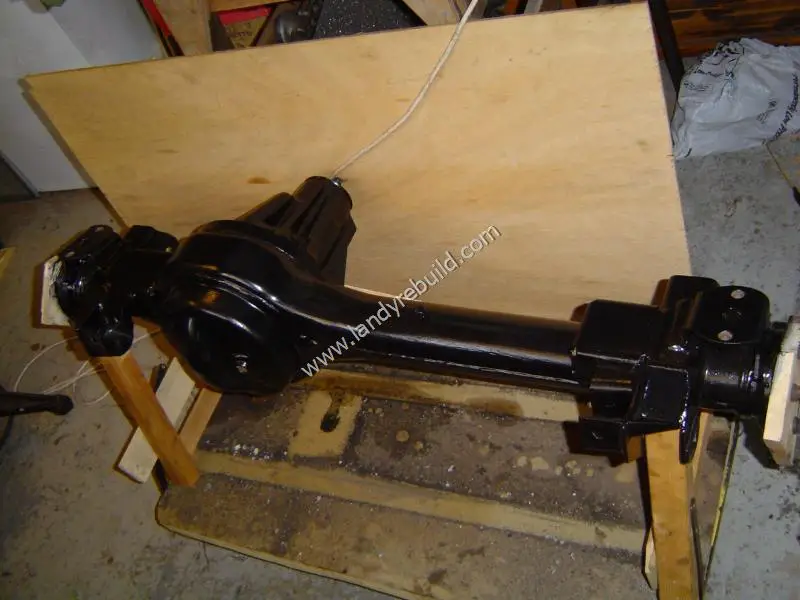
Once everything had been taken back to bare metal, I degreased the surface with thinners, then brush-painted it with Unidox (unfortunately no longer available). This is a zinc-rich primer consisting of 90% zinc, and has the advantage that if a knock or scratch occurs through the layers of paint, it tends to bleed together to seal the scratch. I then applied two coats of Hammerite. Here's the finished axle:
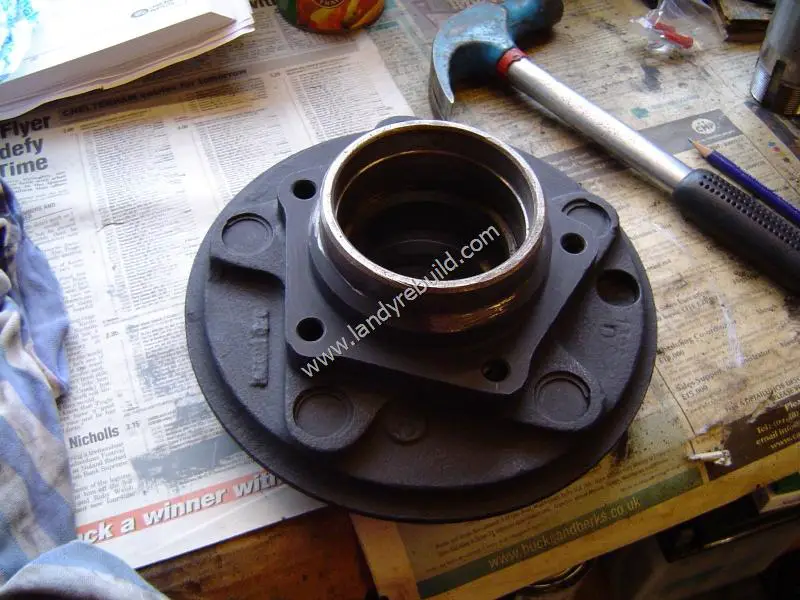
And here's the painted front hub:
Meanwhile a replacement heavy duty track rod had arrived. After careful consideration, I decided to fit a grease nipple to the track rod ends. This was very simple to do; I drilled a hole in the centre of the track rod end cover plate:
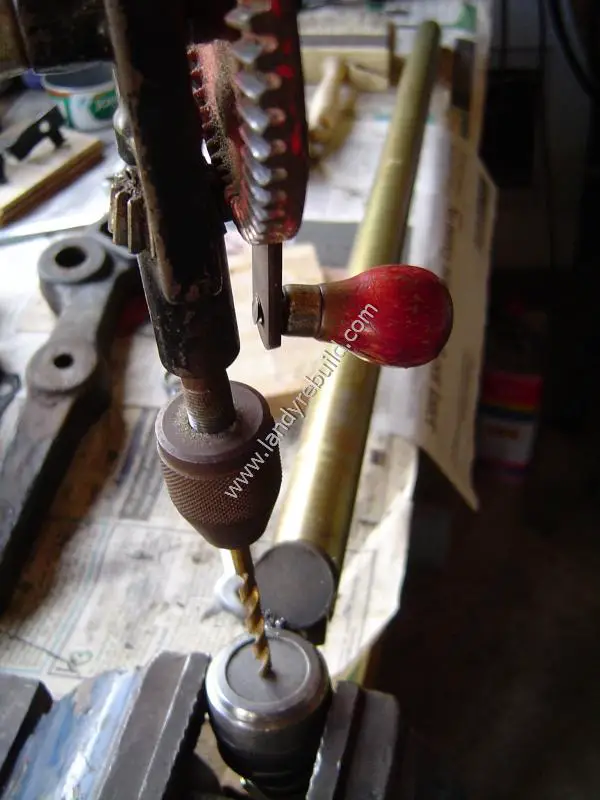
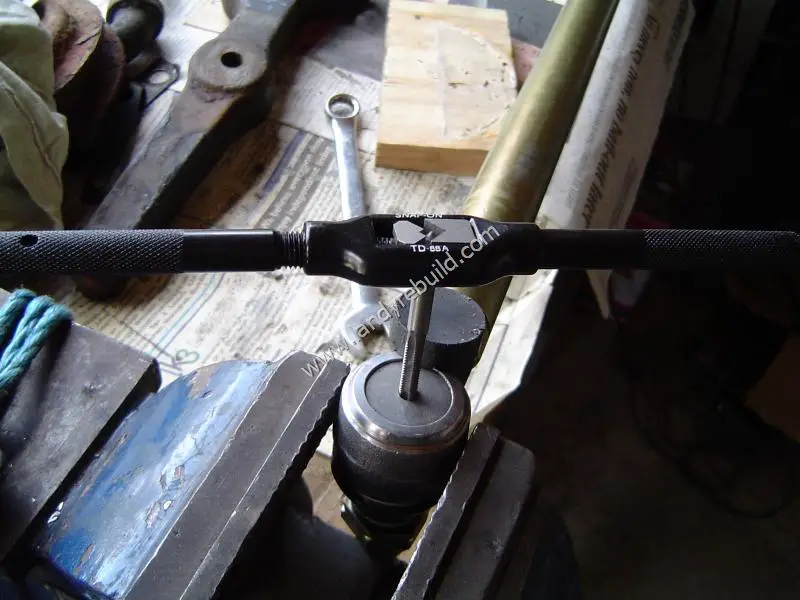
I used a hand drill as you've got to be careful not to drill too deeply and go into the ball which is just underneath the plate. The circular black thing near the end of the zinc-passivated tube is a powerful magnet which I found useful in preventing swarf from dropping down into the drill hole - you don't want that to happen! I then tapped the thread using an M6 tap which I shortened:
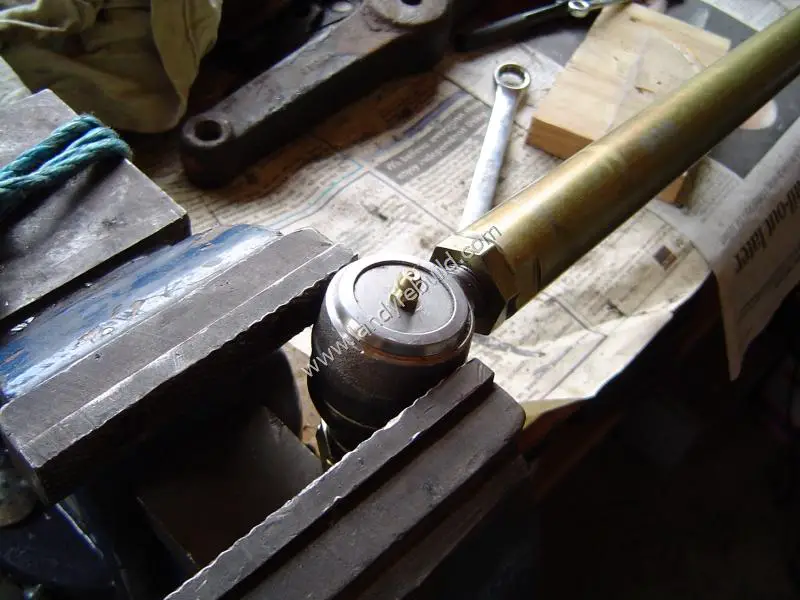
...and installed the grease nipple. Job done!
Comments
Have your say about what you just read! Leave a comment in the box below.
(Your email will not be displayed)
NOTE: All comments are moderated, so will not appear immediately.