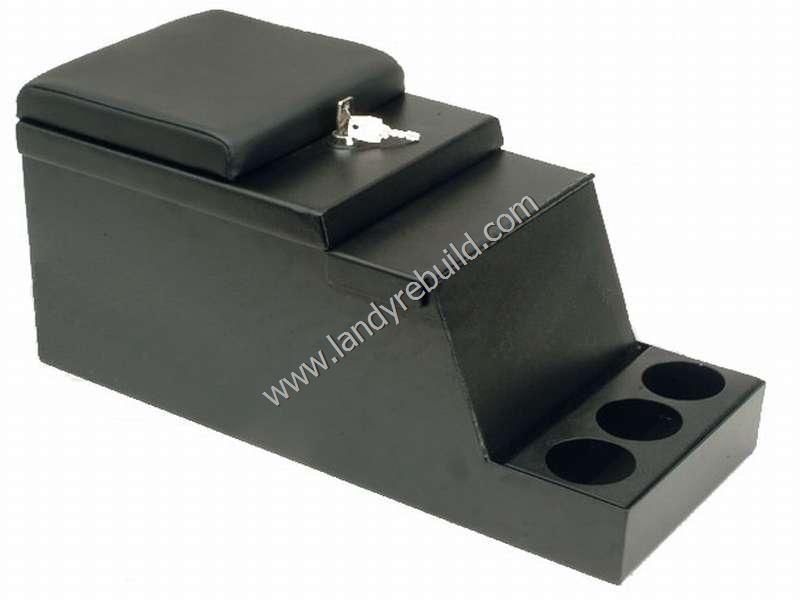
I had decided to replace the centre seat with something more useful, namely a lockable central cubby box. This would provide additional storage space, including somewhere to leave the GPS unit on the odd occasion I didn't want to carry it with me. Obviously for that reason the cubby box needed to be lockable.
At the same time, I figured it would be an ideal location for the stereo head unit. The previous head unit was installed in a plastic frame in the dash - not an ideal spot, as it was visible to would-be thieves (and we all know how secure Land Rover door locks are!)
For the installation, I considered using a piano hinge along the front edge so that the cubby box could be raised allowing inspection of the gearbox tunnel. However I felt this would complicate matters somewhat, and the gear lever would get in the way when it was raised. In the end, I used the four pre-drilled holes in the cubby box base, and drilled four matching holes into the seatbase, inserting some bolts. The nuts are accessible (although with some difficulty!) from underneath the vehicle, but with the cubby box locked I felt this was secure enough. The cubby box also had a 1-DIN sized cutout front section, covered by the locking lid, which is designed for the installation of a stereo head unit (or CB radio if you're so inclined).
It's made from 2mm mild steel and powder coated in black, is fitted with a padded top to form an armrest, and also has a removable drinks holder. I won't be using it for holding drinks so just removed this, leaving a flat-bottomed tray section. I cut out a sheet of 5mm rubber matting to fit inside this, to prevent any contents rattling.
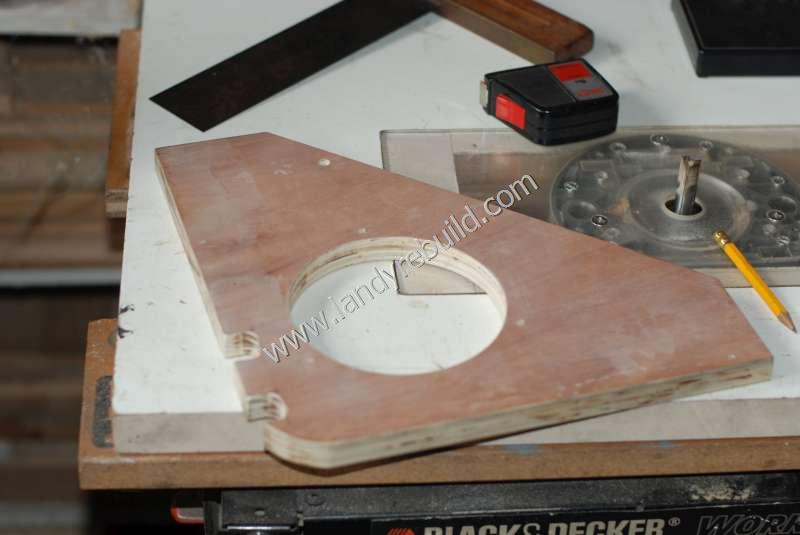
For the front speakers, I had decided to mount these in the doors rather than replacing them in the headlining. This will make it much easier to remove the hard top so the vehicle can be used as a pickup. I had some fairly thick plywood offcuts, so I cut out two triangular-shaped pieces and using my router table, cut out two holes. I then recessed a couple of holes at the edge where the door hinge bolts go through the frame:
The speakers are just mounted to these panels with screws, and four self-tapping screws go into the steel doorframe - using the small plastic lokut nuts which were presumably originally designed to hold the clips for the door cards. It then became a bit awkward to photograph the speaker installation, so I'm afraid it's a bit blurry, but you'll get the idea:
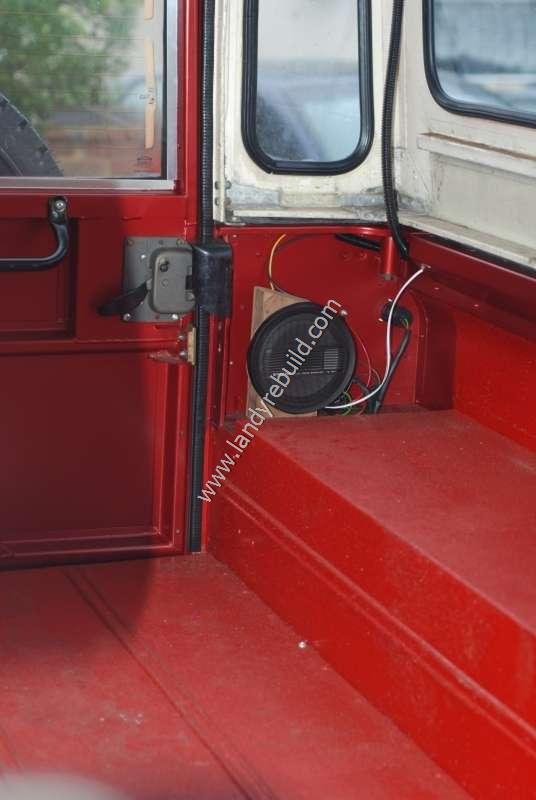
As for the rear, again I moved the speakers from their original positions above the back quarter panel windows to lower down in the hard top body. One of the previous owners had already manufactured some speaker boxes, so I simply re-used these, fixing them to the "seat box" surface with two small bolts. The speaker wires run inside the galvanised top reinforcing strip alongs each side and culminate underneath the cubby box, where they are attached with bullet connectors to the head unit loom.
You will note the Protectakote paint finish in the above photo - hopefully it proves to be as long-lasting and hard-wearing as they say! I didn't bother painting the inside of the hard top side panels as I was running out of time to complete the rebuild - and as the vehicle will probably see more use as a pickup I didn't think it was that important. (My original plan was to line the inside of the hard top with thin plywood and a carpet-type material for sound-deadening purposes).
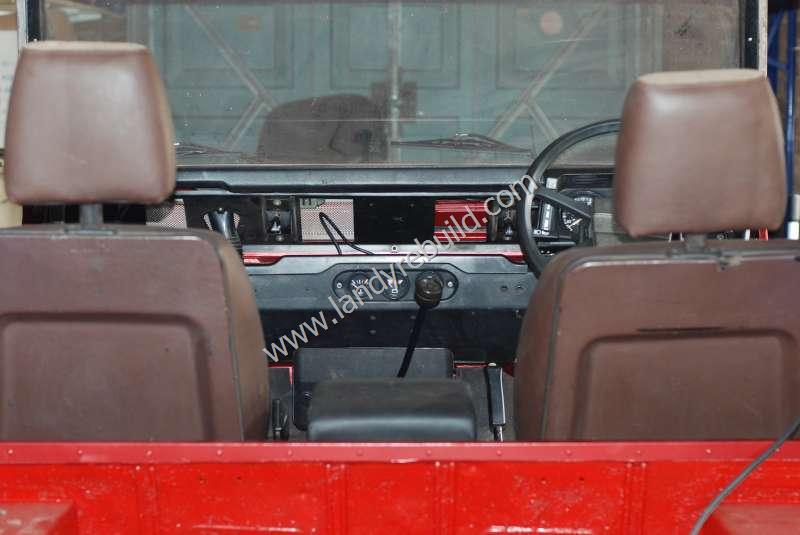
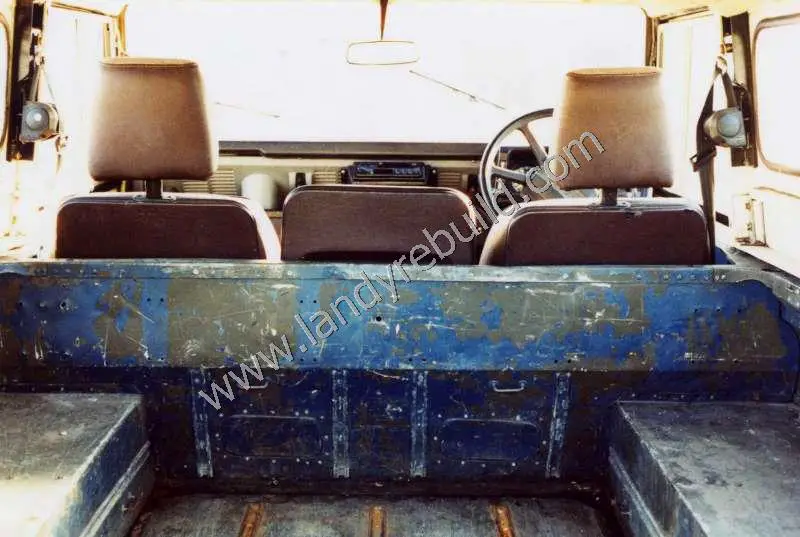
It was also rather difficult to get a photo of the cubby box once it was installed, although you can see the front part of it in the third photo on this page. I also took a photo from the rear door, looking towards the front of the vehicle. You can just see the top of the padded cubby box armrest above the bulkhead removal bar. For comparison, I've included a photo of what the interior used to look like!
Comments
Have your say about what you just read! Leave a comment in the box below.
(Your email will not be displayed)
NOTE: All comments are moderated, so will not appear immediately.