Or, how to open a bottle of wine without a corkscrew
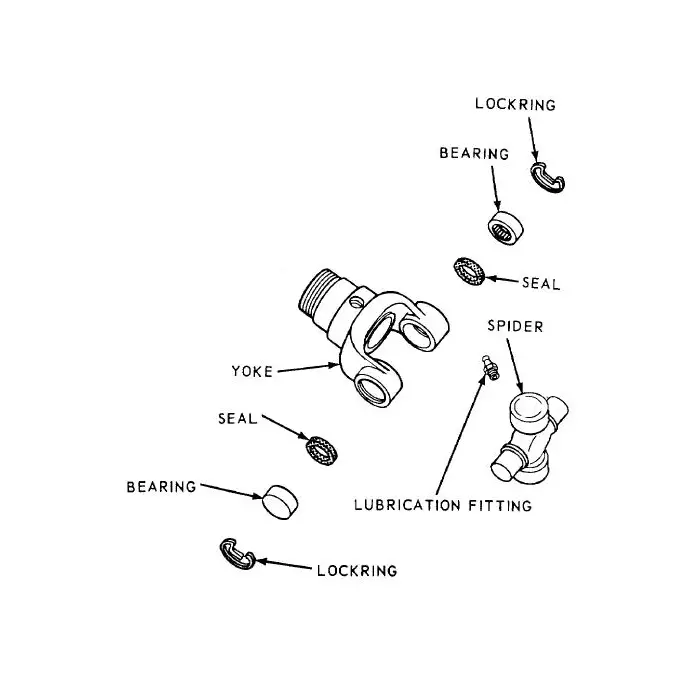
The purpose of a universal joint is to provide a flexible pivot point, because the driven shaft coming from the gearbox is not in the same plane as the propshaft. Similarly, another universal joint is required at the axle end of the propshaft. This pivot point needs to be flexible, because the axles are free to move up and down in relation to the gearbox.
Here's a diagram of a universal joint:
If universal joints are not sufficiently lubricated, their bearings can fail, which results in a knocking noise and/or vibration from the propshafts when the vehicle is being driven. Another symptom is a "clunk" from the driveline when moving off. To investigate whether the universal joints are worn, simply grab the propshaft and try to rotate it back and forth. If there's too much play, replacement of the universal joints is required. You may as well do both ends while you're at it.
Unbolt the propshaft from both front and rear flanges, and remove it. The front propshaft has a rubber gaiter covering the sliding joint; the rear propshaft doesn't have one. The gaiter is easily removed by undoing the two clips and sliding it along the shaft. Now the important thing is to make a mark on the shaft and sliding sleeve so that when it comes to reassembly, the two parts will be in the same alignment as before. If this is not done, the propshaft may well be out of balance (which will cause more of the vibration you're trying to cure by doing this in the first place!)
Similarly, when it comes to the universal joint, mark the yokes so that they can be reassembled in the same relative position.
Now to remove the universal joint, the first job is to remove the circlips or lockrings. Remove the grease nipple (if fitted). Whilst on the subject, if you're replacing universal joints, get ones with a grease nipple fitted - a squeeze of grease every now and then will give them a much increased lifespan.
There are now three ways you can proceed:
- The bottle-of-wine-no-corkscrew method:
Hit one side of the yoke repeatedly with a hammer. Inertia will cause one of the bearing caps to rise from its housing. (This method uses the same principle which enables you to remove the cork from a bottle of wine if you don't have a corkscrew. Simply remove the foil covering the cork, and wrap the bottom of the bottle in a towel. Gently but firmly thump the padded bottom of the bottle against a tree. If no tree is available, remove one shoe and thump it with that. The cork will gradually come out. Now of course I don't recommend you doing this with your bottle of Chateau Lafite 1934, but if you happen to be at a picnic with a nice bottle of red, it does work.)
- The U-joint press method:
This tool looks like a large G-clamp, but the screw part is turned with a type of socket wrench instead of your hand.
- Vice and sockets method:
If you don't have a U-joint press, the third method works just as well, and is the one I prefer. You'll need two sockets; one which is slightly smaller than the diameter of the bearing cap, and one which is larger. Use a bench vice to press the bearing cap into the larger socket. Once one is out, reverse the universal joint and press the bearing cap out of the other side.
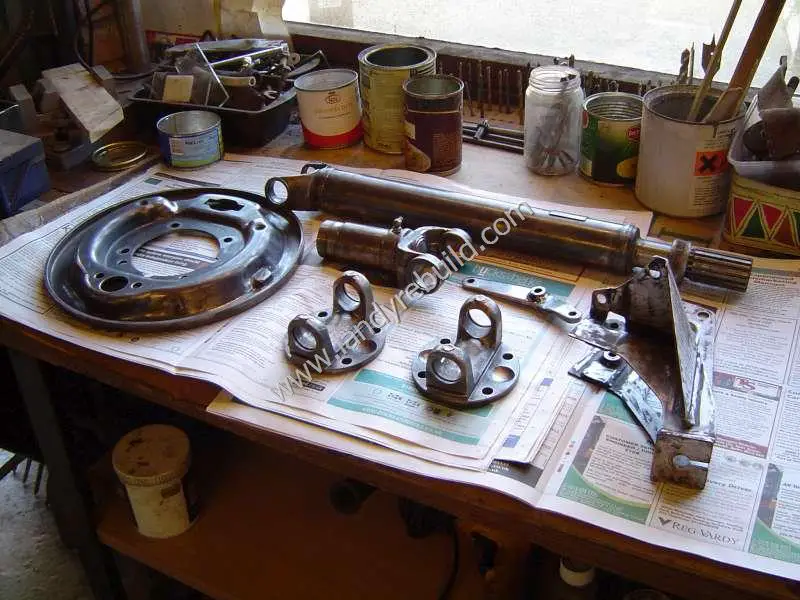
With both bearing caps removed, there will be enough space to remove the spider from the propshaft. With the propshafts and sundry other bits de-rusted and cleaned, they were ready for painting:
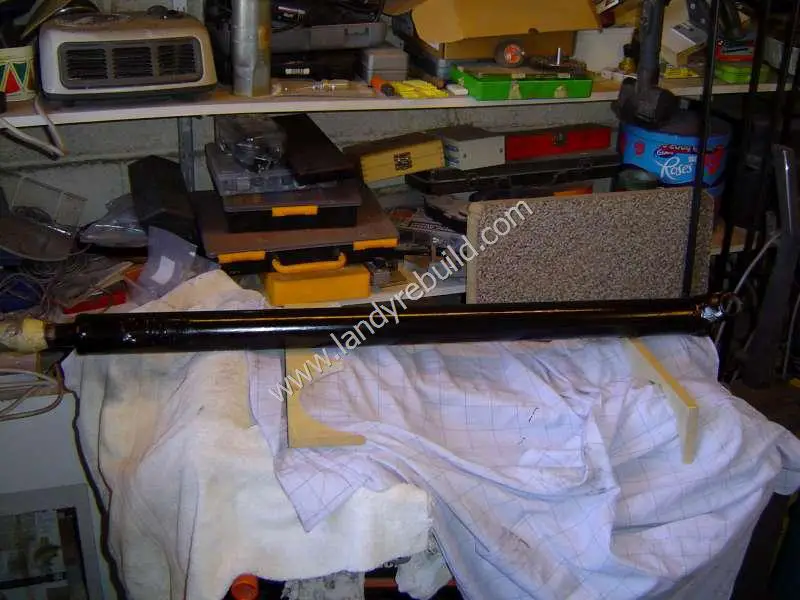
Here's the freshly-painted rear propshaft:
To install the new parts, take the bearing cups off the new spider, and check that the needle rollers are in the right position, and not lying at an angle. Fill the bearing cup 1/3 full of grease. Now put the spider (with seals) in the yoke of the shaft flange, so that the grease nipple is facing away from the flange, and the marks you made on the yokes line up.
Partially insert one bearing cup into the yoke, and insert the spider into it carefully - don't dislodge the needle rollers! Now insert the opposite bearing cup, and again using the vice (or u-joint press if you have one), squeeze both cups in flush with the yoke. They'll need to go in a bit deeper, but for now just make sure the spider can move smoothly.
Now using your smaller socket, press one of the bearing cups inwards until level with the circlip groove. Insert the circlip, and then repeat for the other bearing cup.
Carry out the same procedure to fit the spider into the other yoke.
Finally give the grease nipple a shot of grease until it just starts oozing out of the bearing cups. If the joint articulates smoothly, refit the propshaft. If it sticks a bit, you can try tapping the joint with a soft-faced mallet to make sure the bearings are properly seated.
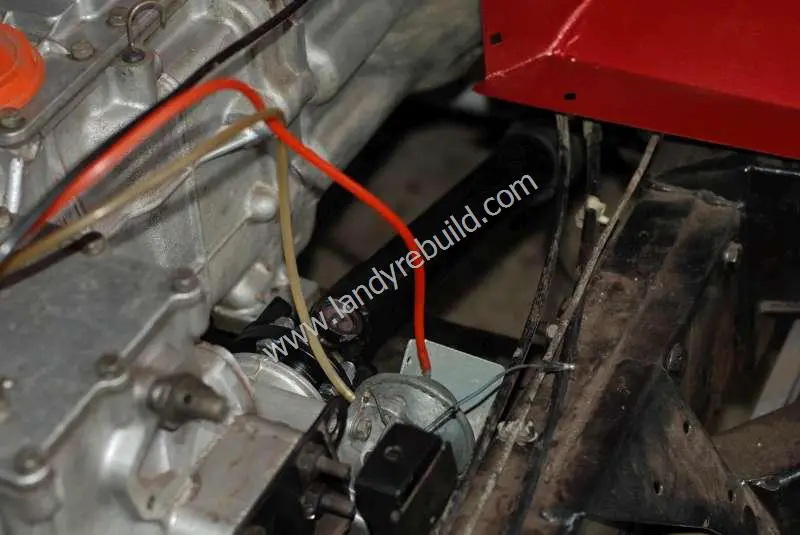
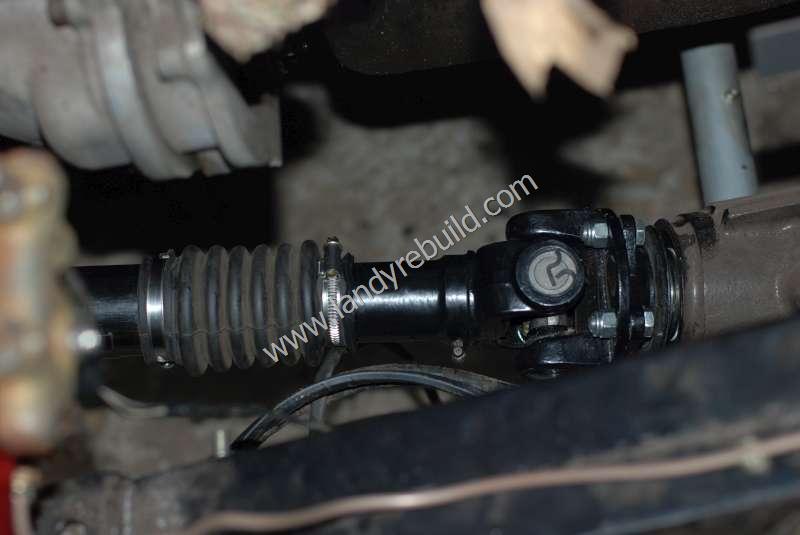
Here's the front propshaft reinstalled in the vehicle:
Comments
Have your say about what you just read! Leave a comment in the box below.
(Your email will not be displayed)