It was now time to refit the rear axle to the chassis. Using the mechanic's creeper the axle was positioned underneath the vehicle, and then the trolley jack was used to lift it into position. The new springs and shock absorbers were installed, and once the axle was in place it was time to reassemble the hubs.
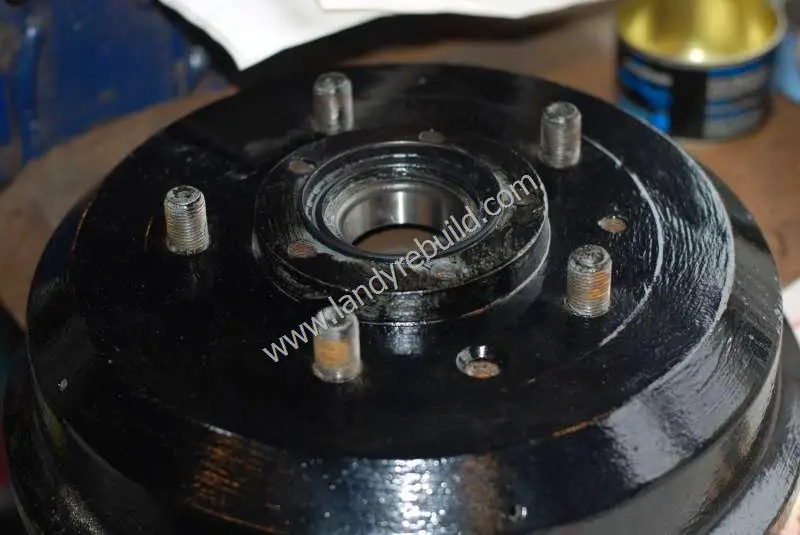
As I did for the front axle reassembly, the first job was to install new wheel bearing races, once again with the assistance of a ground-down old bearing race. (As an aside, I've since found that you don't need to grind down an old race - simply use an angle grinder to cut through one; the cut ends can then be squeezed together slightly, giving you a perfect bearing installation tool). The hubs and stub axles were in good condition, not showing any evidence of excessive wear. One oddity I noticed was that the hub and brake drum seemed to be fused together, and could not be separated into their component parts as shown in the parts manual.
A new gasket was fitted to the axle casing, followed by the brake drum back plate and stub axle. I also took the opportunity to install a new brake slave cylinder. Unfortunately this leaked (I describe this in the section on brakes) as soon as I had refilled the brake system with brake fluid, so it necessitated stripping the hub down again. It's advisable to buy genuine parts for critical components like these.
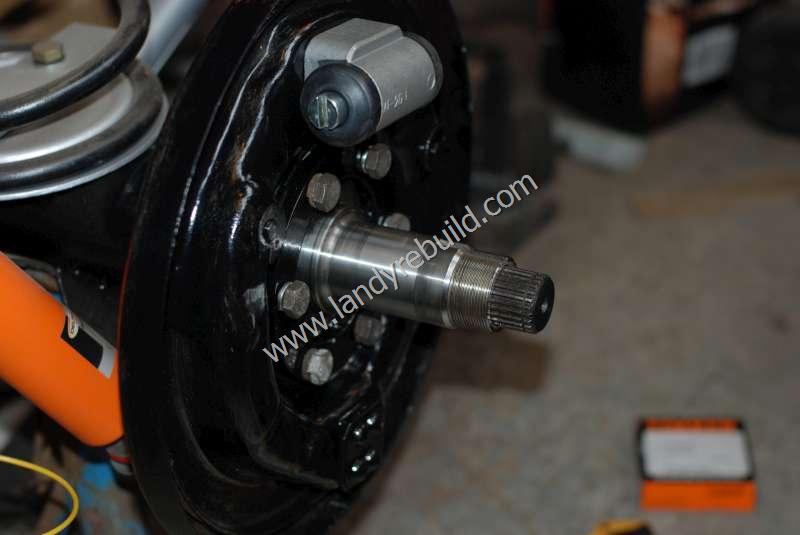
The bearings were packed with grease, and so was the oil seal. Because the 110 is one of the early models, the rear hubs only have one oil seal apiece. Later models have two. The hub was then located onto the stub axle and the outer bearing inserted. This was followed by the keyed thrust washer and adjusting nut. Now the trick to getting the bearing correctly seated is to rotate the hub whilst tightening the adjusting nut. It only needs to be hand-tight, no need to overdo it! Once it's tight, ideally a dial gauge should be used to obtain the correct end-float. Lacking one of these I just slackened the nut by about quarter turn - just enough so that the hub turned smoothly with a bit of resistance.
Then the tab washer and locknut were installed and tightened. One of the washer tabs is bent towards the rear (to keep the adjusting nut from moving), and the other is bent towards the front (to keep the locknut from moving).
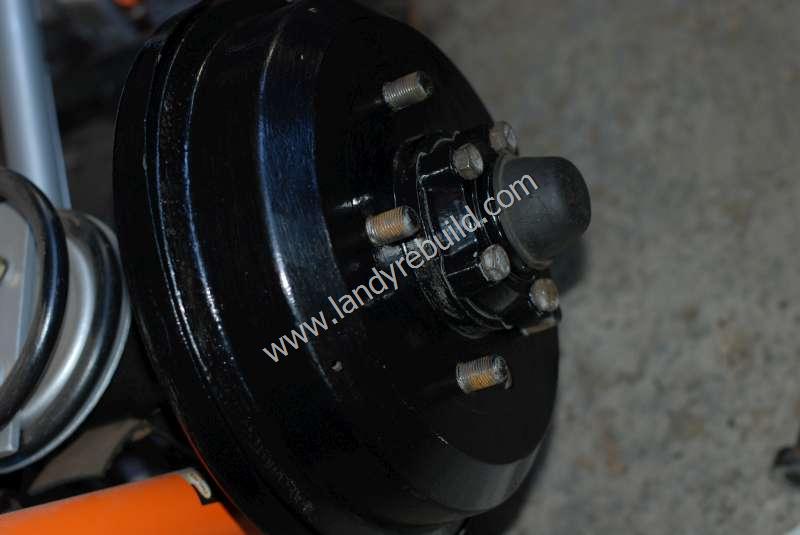
The drive member (with a new gasket) was then installed, and the bolts tightened to the correct torque. Finally the circlip was fitted to the axle shaft and a new dust cap was installed. Speaking of dust caps, the original ones were rubber - but these had cracked and replacements are no longer available. Nowadays they are made of plastic - and there is a trick to installing these. Immerse them in a mug of very hot water for about five minutes. Then take them out (carefully!) and quickly pop them in place. A thump with your fist will seat them properly. (I'd taken the next photo before I figured out the installation method described, so the photo shows the old dust cap in place!)
It was then a simple matter of repeating the above procedure on the other hub, reinstalling the road wheels, and removing the trolley jack.
Comments
Have your say about what you just read! Leave a comment in the box below.
(Your email will not be displayed)
NOTE: All comments are moderated, so will not appear immediately.